For the next few days I’m taking some time off to relax, play with my dogs, and ski with friends. Rather than leave the blog dormant for a few days, I’m re-running some of the most popular posts of the year.
Somewhere between a PowerPoint presentation and a full-fledged video is the audio slideshow. Creating audio slideshows can be a good way to add meaning to slides that otherwise might not mean much without a presenter. Here are some ways that students can create audio slideshows.
Narrable is a neat service for creating short narrated slideshows. To create an audio slideshow on Narrable
start by uploading some pictures that you either want to talk about or
have music played behind. After the pictures are uploaded you can record
a narration for each picture through your computer’s microphone or by
calling into your Narrable’s access phone number. You can also upload an
audio recording that is stored on your computer. Narrable projects can
be shared via email, Facebook, or by embedding them into a blog.
UtellStory is a service for creating and sharing audio slideshows. To create and
share your story through UtellStory you can upload pictures, add text
captions, add audio narration to each slide, and upload a soundtrack to
support your entire story. Completed projects can be embedded into your
blog, emailed to your friends, or shared through your favorite social
networking sites. Watch UTellStory’s introduction here. Creating my first UTellStory project, available here,
took me about ten minutes after registering on the site. To create my
story I uploaded pictures that I had saved on my computer, but I could
have also pulled images from Flickr. Then I added the narration to each
slide. In the free version of UTellStory you have thirty seconds per
slide and up to two minutes of total audio. I rearranged my slides after
recording by simply dragging them into the sequence in which I wanted
them to appear.
Present.me is a handy service for
recording video and or audio to accompany your slides. Present.me allows
you to sync your recorded audio and video to your slides then publish
everything as one complete package. Here’s how it works; upload a set of
slides to your Present.me account, then use your webcam to record a
video of yourself talking about those slides. Your video and slides will
appear side-by-side when you have finished recording. If you don’t want
to record a video, you can simply record audio only. Present.me accepts a large variety of
presentation file types. And if you sign-in with your Google account,
you can import presentations to Present.me from your Google Drive
account.
In my mind one of the original audio slideshow tools is Animoto. It’s been around for a long time (in web 2.0 terms) and it is still a good tool for students to use to bridge the gap between slideshows and videos. Animoto makes it possible to quickly
create a video using still images, music, and text. In the last year
Animoto has added the option to include video clips in your videos too.
If you can make a slideshow presentation, you can make a video using Animoto. Animoto’s free service limits you to 30 second videos. You can create longer videos if you apply for an education account.
YouTube Photo Slideshows don’t have a time limit other than the standard 15 minute limit applied to all new YouTube accounts (there are work-arounds for this). YouTube Photo Slideshows allow you to specify the length of time that each image is displayed for. After uploading your images you can use the annotations tool to add as much text as you like to each frame of your video. If you’re working in a school that uses Google Apps for Education, your students can use their log-in credentials on YouTube so they don’t have to create separate usernames and passwords.
The images below show you how to create a Photo Slideshow on YouTube. (Click the images to view them full size).
Step 1: Log into your YouTube account and click “upload” then click “Photo Slideshow.”

Step 2: Select images from your Google Account or upload images from your computer.

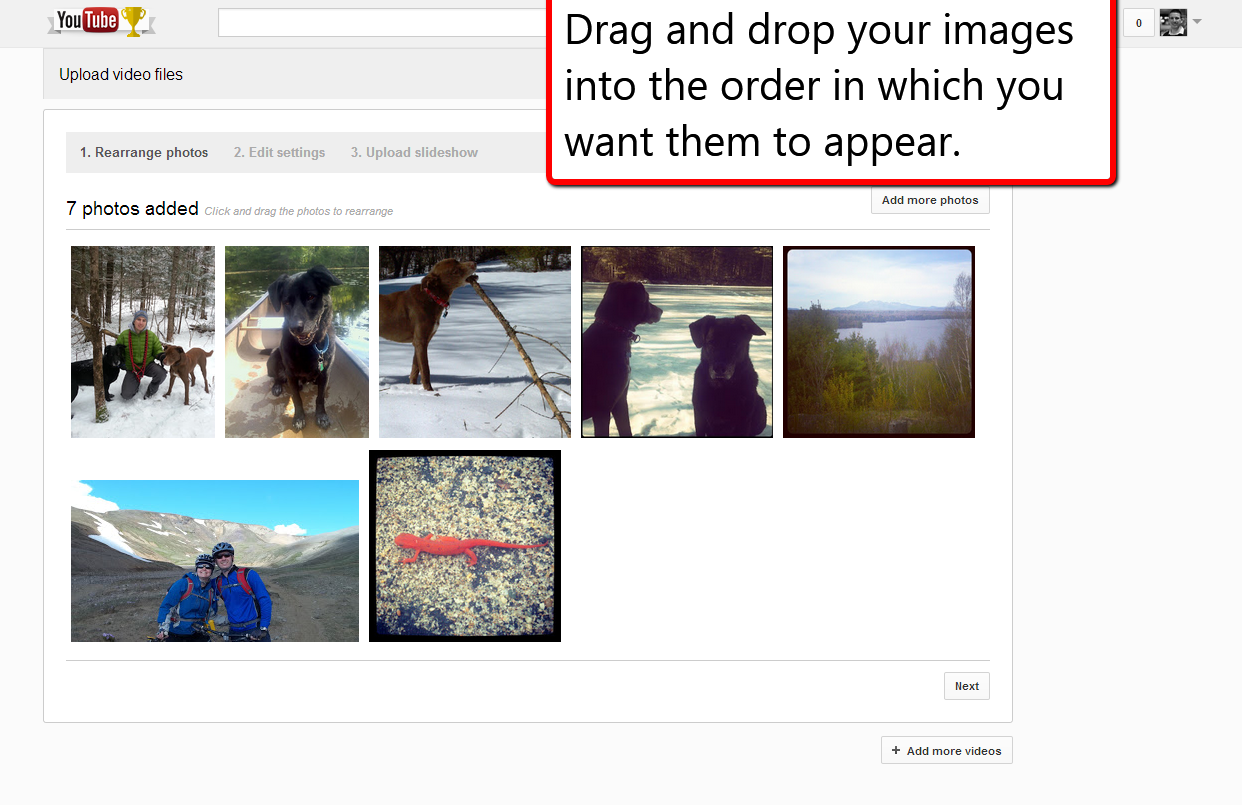
Step 3: Drag and drop your images into the sequence in which you want them to appear.
Step 4: Choose a sound track and select the slide display duration and transition.

Step 5: Enter a title, description, and tags for your images. Select a thumbnail and privacy setting.

Step 6: Use the annotations tool to add text to each frame of your video. You can specify the length of time that each annotation is displayed for.

Watch my sample video below.